Showing posts with label Food Storage/Preserving. Show all posts

Monday, October 3, 2011

The ant is done storing.

Ya know what?  This girl's tired.  I ain't even gunna try to hide it.


As our growing season comes to end, I can't help but feel mixed emotions.  I am sad in the fact that I will no longer be able to gather side dishes from the garden.  I am sad that it will be another year before I will taste the warm, oozy deliciousness of a ripe peach and it will be another year before I will gather a basket full of goodness in all it's garden glory.  Collecting and eating the bounty of the summer is not only entertaining, it is downright wonderful.


That being said.


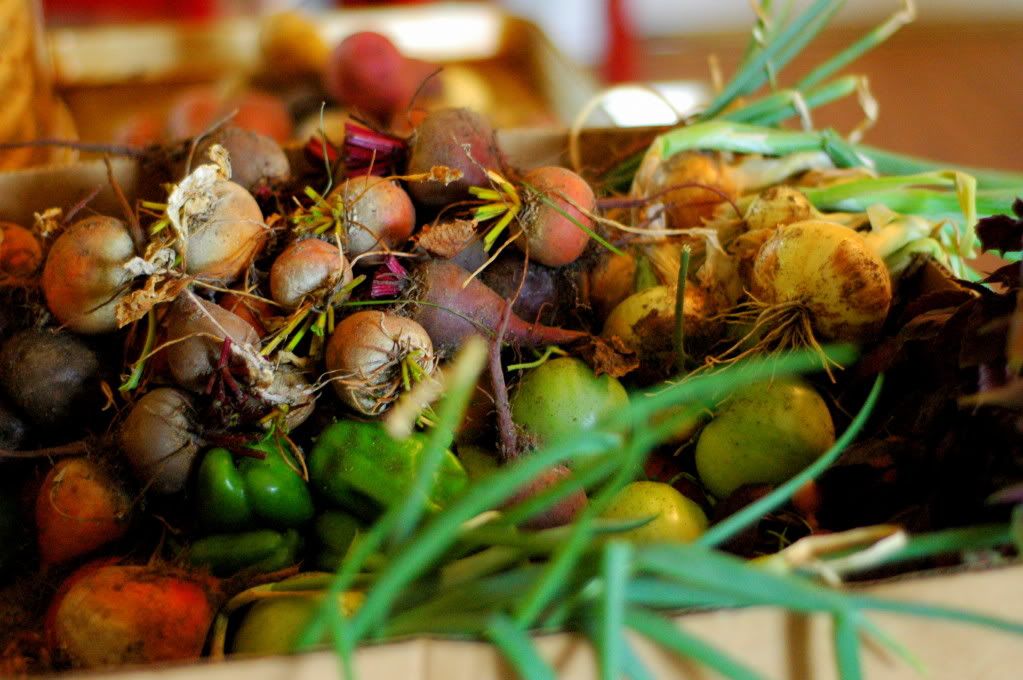
I am also happy.  You see, for the past four months, I've done nothing but dry fruit, pickle beans, freeze and slice a variety of produce, and make chutneys. I've concocted berry syrups and tomato purees.  I've shucked and blanched corn and dehydrated herbs.  I've filled a chest freezer and closet full of summer goodness to be enjoyed year round...and that's a lot of work!


Here's our list of stored & preserved food for the winter (in no particular or organized order) thus far (we still have applesauce, dehydrated apple slices, kale, more green beans, and onions to go!):


6 quarts pickled asparagus
11.5 pounds frozen berries
Frozen/dried dill
5 bags frozen kale
12 quarts canned cherries
Dried cherries, 1/2 gallon bag
Dried peaches, 1 gallon bag
4 gallons frozen cots
Dried pears, 2.5 gallon bags
18 quarts canned cots
Dried coriander
Dried sage
Dried thyme
Dried oregano
Dried rosemary
Frozen basil
2 quarts frozen chives
2.5 gallon bags of frozen peaches
1 gallon bag of peach nectar, frozen
29 quarts canned peaches
4 gallon bags frozen green beans
1 pound frozen jalapenos
2 quarts pickles
8 pints canned banana peppers
2 pints pickled beans
3 gallon bags of frozen, sliced peppers
1 quart frozen green onions
5 gallon bags of frozen corn
2 gallon bags of carrots, stored for winter
1 gallon bag of beets, stored for winter
12 quarts canned pears
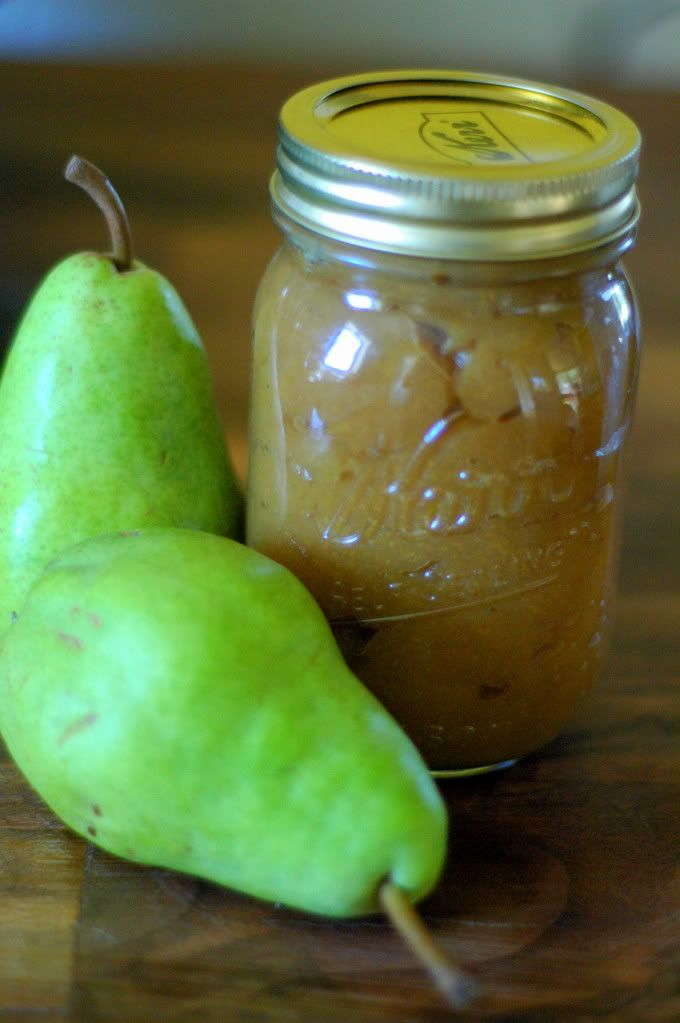
4 pints pear butter
4 gallon bags of frozen tomatoes
1 quart dehydrated tomatoes
3 quarts canned tomatoes


I.  Am.  Tired.


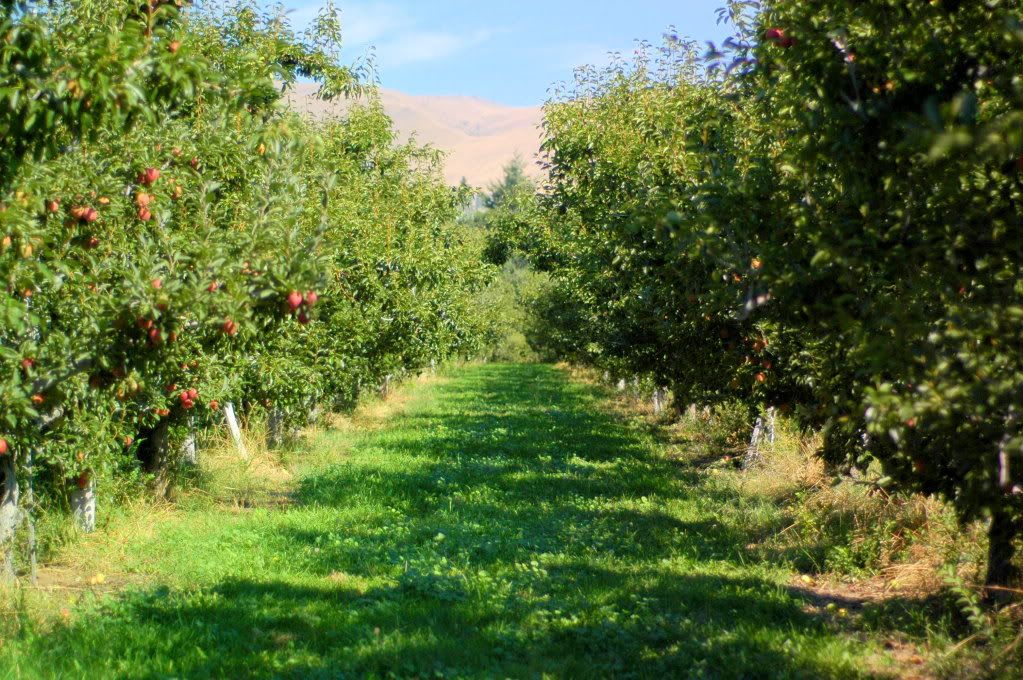
I am fully embracing the shorter days of fall and am enjoying the chill in the air.  I am enjoying sitting down with a pot full of tea at night, with my fuzzy socks on, and snuggling up with a blanket as I type my blog posts.  I am enjoying the cinnamon, nutmeg, and cloves that bring their warmth to baked goods this time of year and I am enjoying the brisk walks through the orchard.


You see, I believe God designed the seasons to be just this way.  We are happy to see them come and we are happy to see them go, each one bringing with it new treasures for us to enjoy.  Sure, by February, I can hardly stand it - I am so anxious to get back in that garden! 


But for now, as of October, I am ready to call it for a season.


This past Saturday, I spent the morning out in the gardens, pulling up the majority of leftover plants.  I pulled the last of the green tomatoes, all the eggplant, most of the onions, kale, green beans, peppers, carrots, potatoes, basil, and beets.  


I'm officially closin' up shop.  Sorry caterpillars, but you're going to have to find someone else's cabbage to destroy.


Now, I've just got to hunker down for a season, in my fuzzy socks, and really work on this danged e-book.  So many projects to do- so little time!


For now, however, I choose to do nothing except for sit in my big brown, comfy chair and drink this delightful cup of raspberry tea my husband made me me.  Because that's how I roll.


What are YOU doing to enjoy the beginning of fall?

Thursday, September 15, 2011

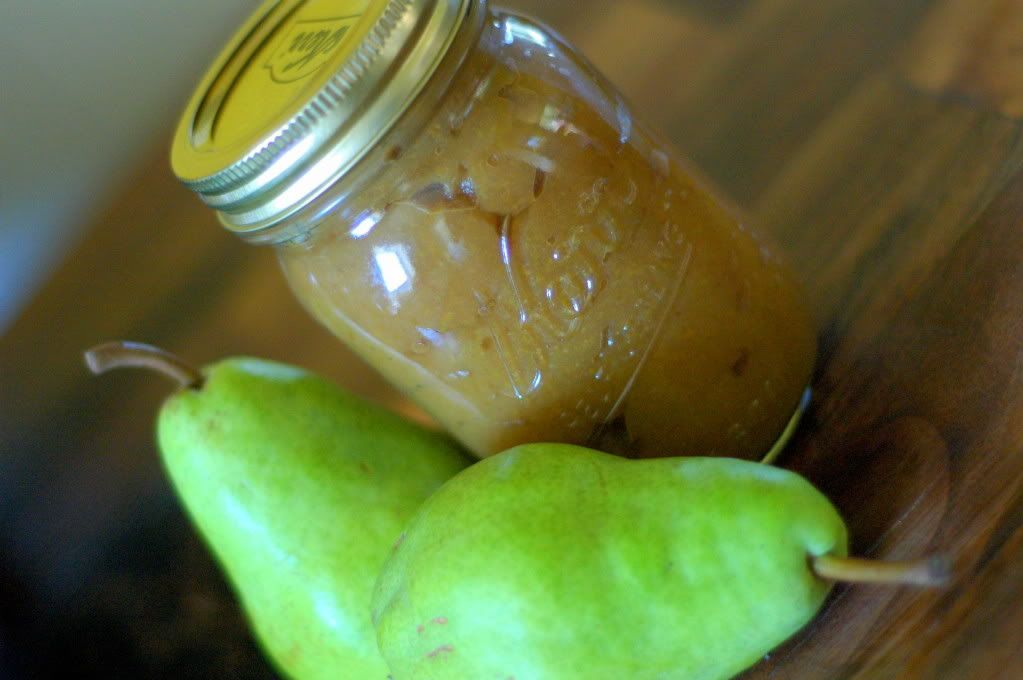
Pear buttery goodness.

Though I've been heavily debating which recipe to share with you next, the wonderful crispness in the morning air made it nearly impossible for me to resist sharing this wonderful one with you.


As I've told you before, this beautiful season, we have been blessed with as many pears as we can possible handle.  We've been canning & dehydrating like madmen!


I use the term "we" loosely, and by loosely, I mean I use "we" to mean "me" (as Stuart has yet to share in my preserving enthusiasm).  "All by myself...don't wanna be...all by myself...anymore..."


Anyway.  For the past few years, I've been wanting to make pear butter, yet for one reason or another, had never gotten around to it.


Well this year, I did.  And oh, am I so glad.


A few nights ago, Georgia and I ventured into the orchard with buckets in hand.  I filled the buckets completely with fruit that had fallen on the ground, specifically choosing the pears that were very ripe.  Bruises?  Sure!  Rotting spots?  You bet!  Mush on half of it?  I'll take it!


You see, the beauty of pear butter is that you don't have to use your beautiful pears to make it.  In fact, the more ripe the fruit, the sweeter the overall butter will be at the end.  So use this recipe to utilize all of those past-prime & less-than-gorgeous pears you've happened across this season.


Side-note:  This recipe is a "low-sugar recipe", meaning I am mostly relying on the sweetness of the fruit for my sugar.  I can't stand preserve recipes that are 50% fruit and 50% sugar!  Yikes!  Instead, I chose to opt for a recipe that would utilize all the goodness already in the 'ol pear and one that is simply enhanced by the addition of a natural sweetener.


Okay.  Enough jabbering.  Let's party.


Pear Butter.


You will need:
 - 3 lbs. of overly ripe pears
 - 2 teaspoons of lemon juice (optional)
 - 1/4 cup rapadura or honey
 - 1 cinnamon stick
 - 5 cloves
 - 5 allspice berries
 - 1 tsp. vanilla extract or 1 vanilla bean


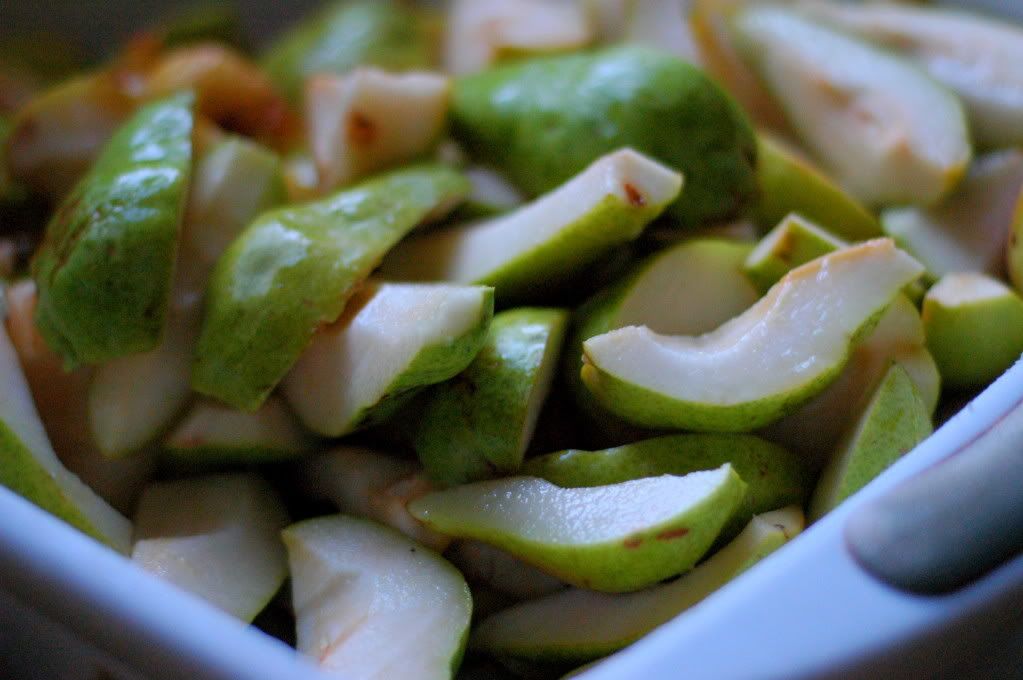
Step One:  Clean the pears up.  Give them a water wash, and using a paring knife, cut out all of the rotten spots and such.  Bruises are really no big deal...but we don't want anythin' too grody in here.  Be sure to remove the stem and core too.  


Step Two:  While I sure wish I had a wonderful food mill to run these pears through, I didn't.  But what I did have is a food processor, though I think a blender would work wonders here too!  I simple put a load of pears into the food processor and pureed them until they were nice and smooth!  Sometimes, I had to stop it to scrape the sides of the bowl, then re-run for a few more seconds in order to get all the chunks.  The overall goal of this step is simple:  puree the pears by any means necessary.  Something tells me you're inventive enough to figure out the "how"...


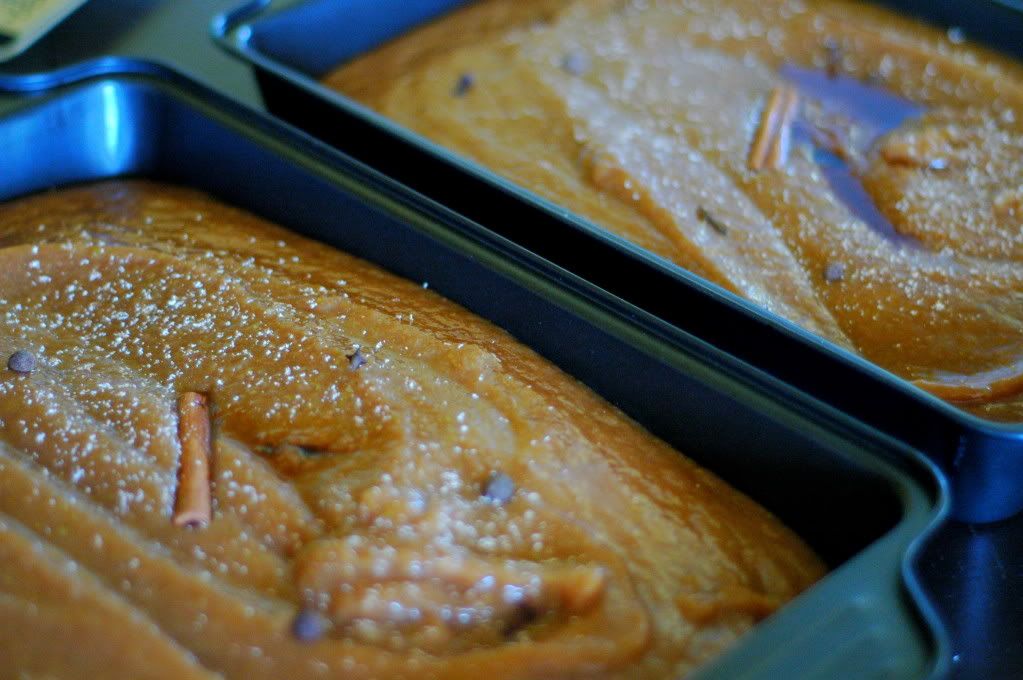
Step Three:  After the pears are pureed, mix in the lemon juice, sugar or honey, vanilla, and spices.  Mmm.  Then, pour the pears into a 9 x 13 pan (or two!).


Did someone say fall?


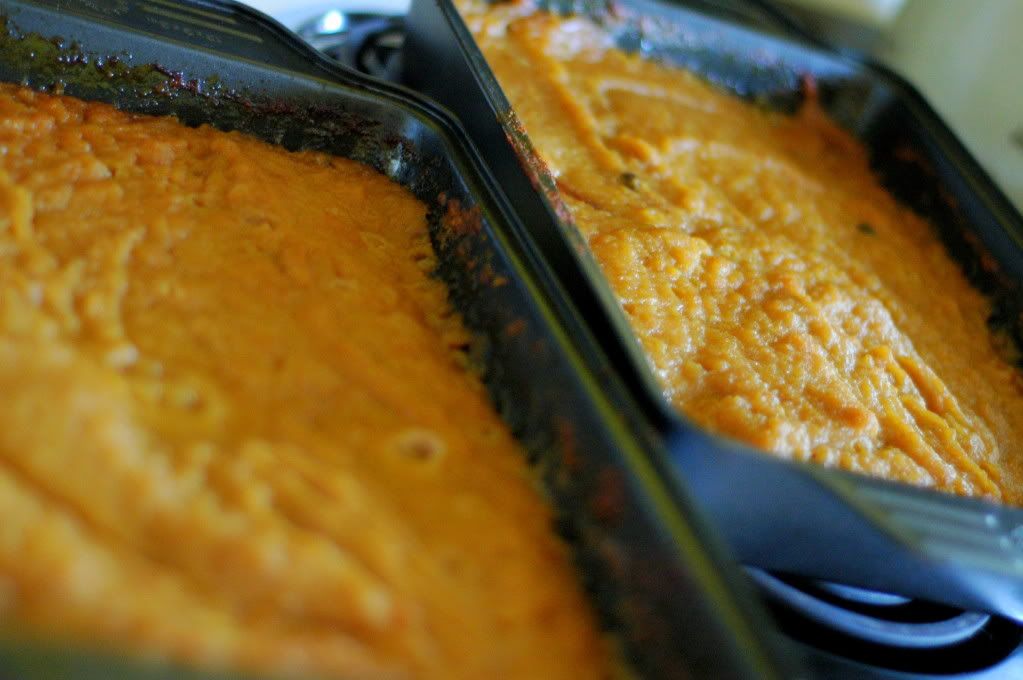
Step Four:  Bake the pears in a 300 degree oven for 2-3 hours, stirring every 30 minutes or so.  The longer you cook the pears, the thicker the resulting butter will be.  I left mine in for 2.5 hours, and was pleased with the overall thickness at the end.


Step Five:  Once the pears are thickened to your liking, remove them from the oven.  Then carefully remove the cinnamon sticks, allspice berries, and cloves.  


Step Six:  Try to not stick your face in the pan and lap this pear butter up like a thirsty dog.  Trust me, you'll want to.  It made my house smell like a fall-fairy had come to party.  It.  Was.  Amazing.


Step Seven:  Okay.  Now, you can either store this in your refrigerator (it will last for about a month and a half...) OR you can do what I did and can it!  Simple ladle the pear butter into sterilized half-pint, pint, or quart jars, adjust your two-piece lids on, and process in a water-canner for 10 minutes.  Though I won't elaborate on the details, make sure you follow all the canning-protocol to ensure success!  


Note: This recipe is easily doubled or tripled to your delight.  I tripled it.  Because that's how I roll.


And that's all folks.


Pear butter a la ice cream.


Pear butter a la toast.


Pear butter a la biscuit.


Pear butter a la oatmeal.


Every single morsel of this wonderful preserve shrieks of the goodness of fall.  And though I am still sad to see summer fading, smelling this wonderful treat makes me eagerly anticipate all the goodness that fall brings with it.


Like applesauce.  And football games.  And sweatshirts.  And pumpkins.


Mmm!  I can hardly wait!


But until then, I must keep busy with my task at hand:  Survive summer harvest.


If you don't hear from me for the next few weeks...send help!


Enjoy!

Wednesday, September 14, 2011

11 Steps to Whole Foods.

I've been asked by a few readers to provide them with a small list for switching over their cooking to a more whole-foods based diet.  And while our "system" is not perfect, it is none-the-less a work in progress.  Our current cooking-state has been acquired over years...it was by no-means an overnight change.  If you are overwhelmed, I hope you find encouragement in the fact that even small, simple changes can have an overall positive affect on the health of your home.  As I try to often remind you, whole-foods cooking is a journey...a walk, if you will.  You just have to remember to put one foot in front of the other.


So, here are a few of my tips for those looking to make some changes:


1.  Soak your grains.  
     Honestly, I think this one can be the most difficult because it requires proper planning.  For example, if I want to make pancakes on Saturday morning, I need to mix up the batter and let it soak overnight on Friday.  But don't fret - there are going to be times when soaking just doesn't happen.  The point is not to be perfect, but rather to make a habit of planning ahead.  Quinoa, lentils, beans, rice, barely, wheat, oats, etc. all benefit greatly from soaking.  Phytates are broken down and without them, more minerals are able to be absorbed by your body. Your getting more nutritional value out of the same food - talk about a free lunch!  Primarily, we soak all our breads, biscuits, rolls, pancakes, waffles, oatmeal, and even cookie batter. 


Which leads me to my next tip...


2.  Make your own bread products.
     Sandwich bread from whole wheat flour.  Biscuits, scones, waffles, pancakes, cake mixes, pizza crust, tortillas and more!  It may take some time to establish in your home which ones are worth making for you and which recipes you prefer.  Not only is the nutritional content much higher in homemade bread products, but it is also free of all the additional bogus ingredients.  Refined flour used in commercial bread provides your body with almost no nutritional value - plus, when you make these products at home, you are free to soak and ferment the dough as you wish!  Start with one product, then gradually work your way through your pantry, learned to make another....and then another...


3.  Learn to make kefir.  And drink it!
     Making kefir at home takes almost no-energy.  It sits.  In a mason jar on the counter for a day.  Then, you strain out the grains and put fresh milk on them.  The liquid strained off from the grains is your kefir, which you can drink to your delight.  Nothing will jump-start your inner eco-system quite like kefir.  You can read my detailed post about kefir HERE.  Not only is it delightful in smoothies, but it is also an optimal liquid to use when you soak your grains (see #1 and #2 above!).  Kefir works as a great acid medium, so it's very handy to have in your fridge.


4.  Substitute olive oil and/or coconut oil and/or real butter for vegetable oil and margarine.
     From a whole-foods standpoint, olive oil, butter and coconut oil are both a better alternative to vegetable oil and margarine.  Olive oil comes from the squishing of olives - that's it.  Coconut oil comes from the meat of the coconut - that's it.  Butter comes from the cream of cow's milk - that's it.  Vegetable oil and margarine both come from some serious Frankenstein-type chemistry and processes, yielding a product that is (some would argue) nutritionally toxic to our bodies.   


5.  Eat fats.
     But the good kind.  Avocado, soaked nuts, high-quality oils, high-quality butter, high-quality meats, wild caught fish, and raw milk are all great sources for fat.  I think one of the worst things one can do while trying to eat "healthier" is to avoid these wonderful fats.  Our bodies needs fat to function and when we supply it with the quality fat it needs, it can continue to build strong bones and muscles.  Depriving your body of fat ain't leading your anywhere good - trust me.


6.  Drink raw milk.
     From a dairy that you know and trust.  Raw milk is truly liquid gold - rich in fats, vitamins, minerals, and goodness.  It helps to build strong bones and build your immune system!  Cup for cup, your body will absorb many more nutrition from raw milk then it will from pasteurized milk (especially ultra-pasteurized which renders calcium un-usable!).  Yes, it can be inconvenient to find.  Yes, it's expensive.  But it's worth it, especially for the little ones.  If you find that you're family goes through it too quickly, try watering it down a little to help to stretch further.  See my 'Resources' Page for a website that will direct you to a dairy near you!


7.  Switch to natural sweeteners.
     We've talked about this a little before - making the switch from refined white sugar to natural alternatives, including rapadura, raw honey, maple syrup, and more.  This step tends to take some time, as it is a process to slowly weed out all of the products on your shelves that contain refined sugar.  Look at it like this: the goal is to replace a nutritionally dead product (white sugar) with a product that is rich in nutrients.  Start small.  Start with one thing (cookies, maybe?...or sweetening oatmeal?) and slowly but surely, you will be able to all but eliminate it from your diet.  


8.  Cook at home.
    This can also be a difficult step, as many of us are in the habit of eating out for multiple meals a day even.  By cooking at home, you are able to have control over which ingredients you use, as well as how much of them (sodium, anyone?) you use.  One of the easiest ways to make a positive change to your eating habits is to get in the habit of cooking things yourself.  Come on, I know you've got that inner Martha Stewart in you somewhere!


9.  Acquire a taste for all things vegetable.
     Vegetables eliminate nasties from your body.  That is their role - detox.  Get them into your system by any means necessary.  Raw, cooked, blanched, sauteed, grilled, mashed...whatever.  Just eat them.  And a lot of them.  I know this sounds cliche, but do as your mother taught you, my dear, and eat your peas.  I'm still trying to convince my husband to do this one.


10.  Choose high-quality meats.
     This is different for each species - chicken are best when they free range, beef is best when it's primarily been grass fed, and fish is best when it's been caught in the wild.  The logic is simple - what the animal eats, we eat.  If the animal eats poo, we eat poo.  And I for one do not want to eat poo.  I shan't.  And thus, I primarily choose meat that has been locally raised (where there is still the accountability factor), humanly treated, and properly fed.  You know why almost all commercially-raised animals are fed corn?  Because it makes them fatten quickly.  Perhaps it is not such a great idea for us to do this as well...I'm just sayin'.  See my 'Resources' page for the nearby ranch we order our beef from.  Also, if you'd like to read why we eat meat, you can find that HERE.  And if you'd like to ask me specific questions as to what I learned and saw while working on a 40,000 head feedlot after college, I'd happily entertain you.


11.  Enjoy the journey.
     If you don't enjoy the whole-foods journey, trust me, it's going to be a loooong road.  Learn to love the seasons and the bounty that they bring.  Learn to enjoy some freshly cooked, wholesome food and learn to get excited at things like freshly baked bread...


...and kefir smoothies...


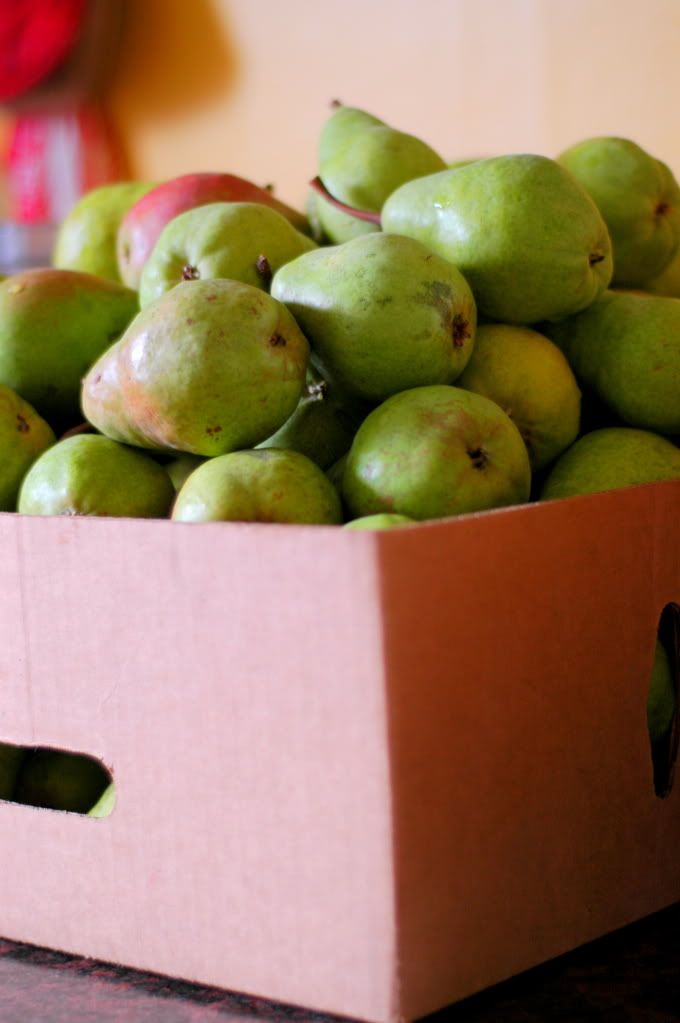
...and a box full of fresh pears...


...and soaking lentils...


...and a stash of butternut squash...


...and an amazingly good balsamic...


...because that is where the joy of the journey is! Celebrate it!

Friday, September 9, 2011

Pears, peace, and The Pundit's Folly.

God is good.


As I was near a hormonal breakdown over these last few days, he heard my cry.


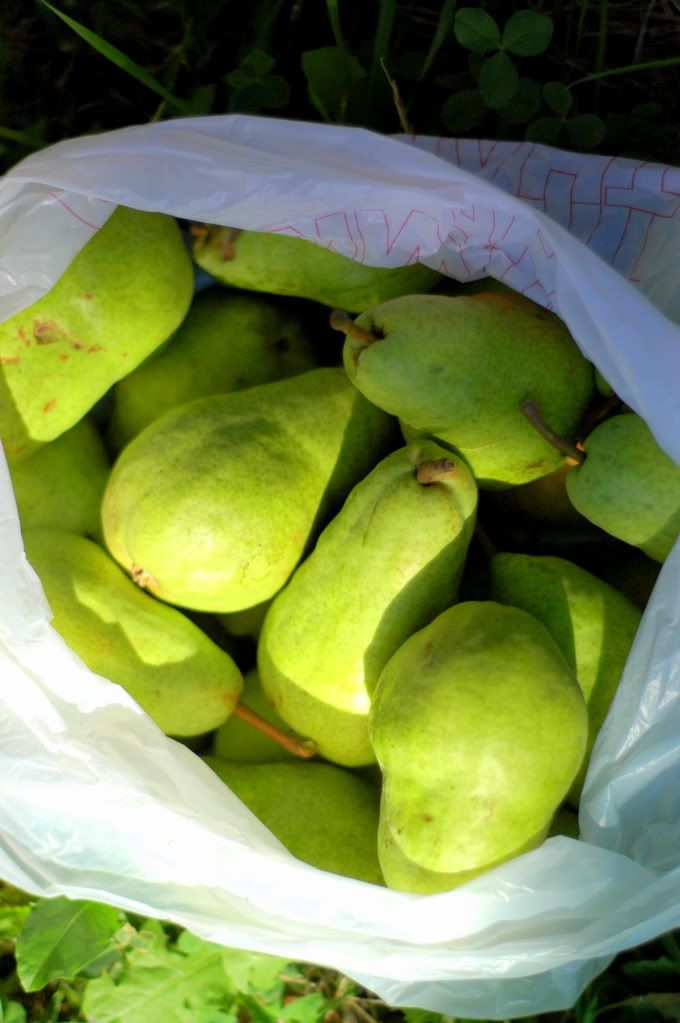
And so he sent me these:


Sigh.


He knew exactly what I needed.


Pears are therapy.


As I sat picking out the ripe ones yesterday to prepare them for dehydration, I just felt this overwhelming peace that I have been missing.  I slowly washed each one, carefully cutting out the bruises.  Then, I cut them carefully into thin slivers, and placed them on the dehydrating sheet.  Nothing fancy.  Nothing formal.  Just me, a paring knife, a box of pears, and a little baby burying her head into the back of my knees.


Have you ever heard the old story about a mother telling her daughter to pick all the seeds out of a watermelon?  To ease her mind?


Well, these pears were those watermelon seeds.


The sky was overcast, but warm, and the smell of those ripe, deliciously juicy pears just took my mind to fall.  To a time of coziness and comfort.  And that's exactly what I needed.


When I asked our landlord/neighbor if I could purchase a few box of pears during harvest, he lovingly told us that we could glean as many as we liked after they were finished picking.  So J-Money, Stuart, G-Baby, and I waddled through the orchard, our hands full of pears from the ground and upper limbs.  I don't think Lee knows how much gleaning means to this little 'ol heart of mine.  I surely do not mind cutting around the bruises of the imperfect fruit.


As I continually chase the chores to be accomplished on the homestead this time of year, I am reminded of a most wonderful excerpt from a favorite book of mine: The Pundit's Folly.


     You have made us for yourself
     and our hearts are restless
     until they find their rest in you.


There is nowhere else to go, no other foundation from which we can drink to quench our thirst.  God alone can do that.


Be it momentary joy, I will no more find a continued peace of mind in this box of pears than I will in a clean house.  These chores, albeit important and glorifying, shall pass.  The joy that they bring shall fade.  As Scottish poet Robert Burns penned:


     But pleasures are like poppies spread
     You seize the flower, the bloom is shed
     Or like the snow falls in the river
     A moment white, then melts for ever...
     Or like the rainbow's lovely form
     Evanishing amid the storm.


I suppose I have spent far too much time hoping I could find satisfaction in accomplishing tasks and chores, when really, true rest and contentment can only be found in the Lord.  And it is only through Him I can find the peace I so deeply desire.


Although sometimes, truly, I do believe he sends that peace in a box of pears.


Because He knows what I need before I even ask.


Even if that need is a fruit.


And Amen.

Thursday, August 25, 2011

Balsamic. The real stuff, baby.

I asked my husband the other day…I said, “Husband, I think I may be a food snob.  And you know why?”

Husband replied, “Because you will only drink raw milk?”

“Because you primarily only buy organic food?”

“Because you won’t by eggs from the store?”

“Because you are hell-bent on making everything yourself?”

“Because you insist on ordering 60 pounds of rapadura?”

“Because you won’t eat fast food?”

Ahem.  “No…that’s not what I was thinking…” I replied, gently.

“Oh.”  He chuckled.

“I think I am a food snob because I will never, and I repeat, never go back to eating regular balsamic vinegar again.”

You see my friends, I’ve discovered something…magnificent.  Delicious.  Decadent.  Truly, out of this world.

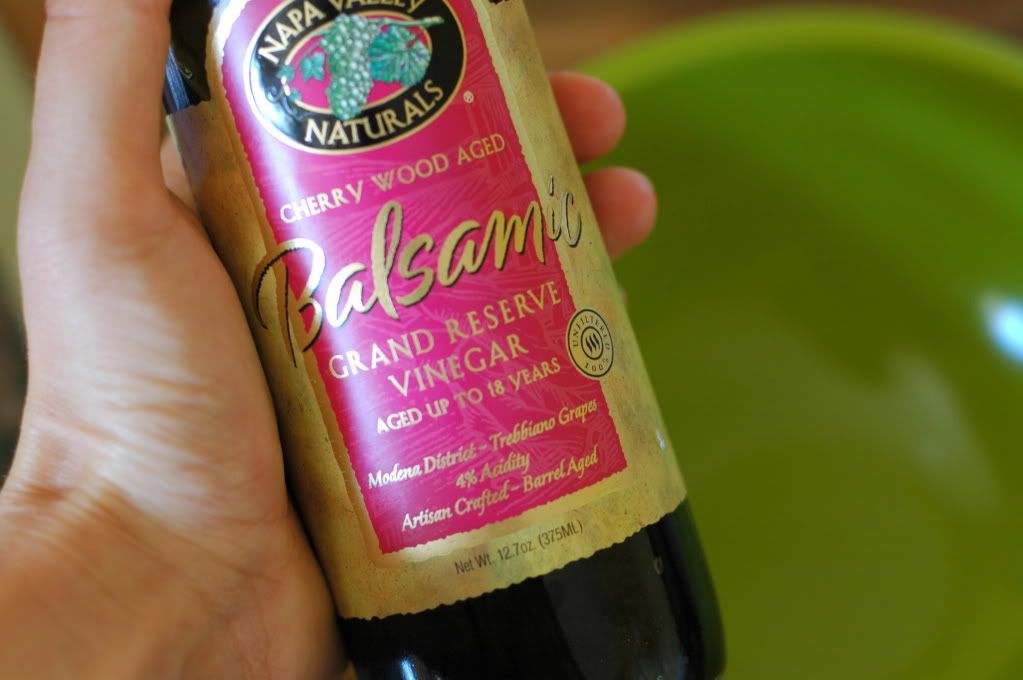
Aged Balsamic Vinegar. ‘Grand Reserve’ Balsamic Vinegar, to be exact, that has been aged for 18 years in a cherry wood barrel.  It's Napa Valley Naturals Balsamic Vinegar Grand Reserve.  Whew, that's a mouthful. 

On my monthly Azure Standard order, I picked out a regular bottle of balsamic to add to my cart.  Then, I noticed this unpretentious bottle…only a few dollars more…staring into my soul.  It promised a sweet, syrupy vinegar…free of additives, naturally fermented, aged, and utterly divine.  So I got it…

…and you’ll have to pry it from my cold, dead fingers if you ever want to try and take it from me.


It's soft.  Dimensional.  Rich.  Not bitter, or "vinegary" tasting at all. 

Let’s look at the ‘ol Balsamic Vinegar – shall we?

There are three types of Balsamic Vinegar available:
1.     Artisan, traditional authentic balsamic, aka: Aceto Balsamico Tradizionale– created from a reduction of Trebbiano and Lambrusco grapes.  It is aged for a minimum of 12 years in a variety of different sized casks (of varying woods).  This balsamic is super syrupy, sweet, acidic, and flavorful. 
2.    Condiment (or condimento) Grade Balsamic Vinegar – May be made in a variety of traditional or modern ways, or may have just been aged for less than 12 years.  There are no standards for producing “condiment” grade balsamic – so you’ll have to do some research to end up with a good one!
3.     Balsamic Vinegar of Modena – Essentially, this is a commercial grade product that imitates the real stuff by mixing grape juice, a thickening agent (ie: cornflour), caramel color, and Lord only knows what else.

As with wine making, or any artisan created product really, it can become very complicated after this.  However, in layman’s terms, there is good balsamic.  And there is bad balsamic.

There is real balsamic.  And there is fake balsamic.  

And oh.  Oh my.  Oh me oh my.  I've tasted the real stuff.  And I like it.


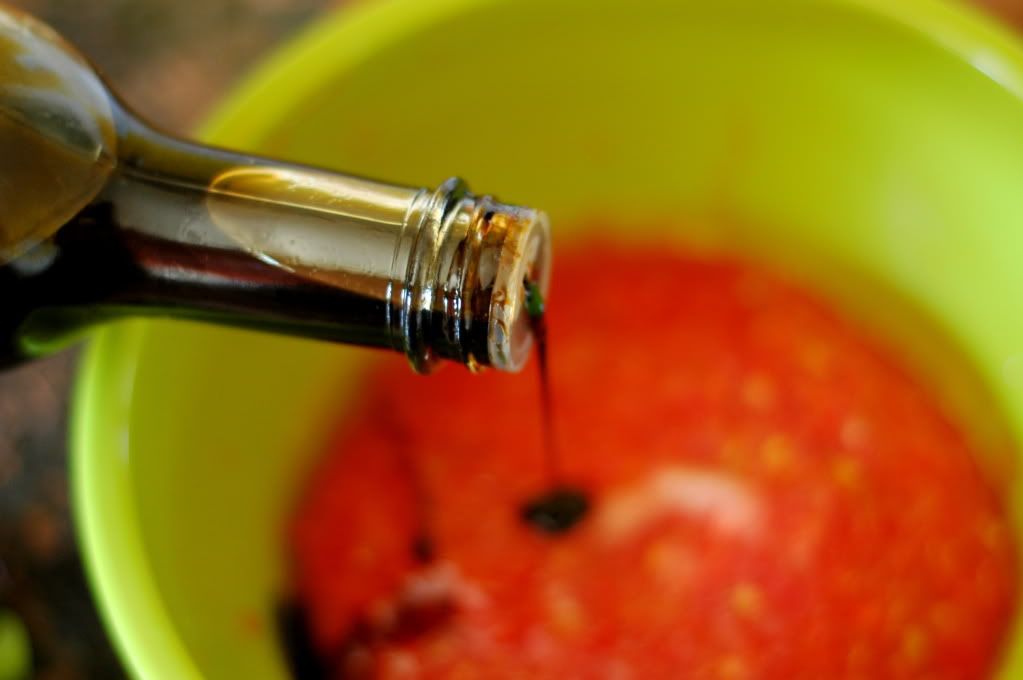
So in a week, I've used nearly half a bottle of it.  From drizzling it on my vegetables to smearing it on my roasted chicken to sprinkling it on my strawberries (don't knock it till you try it!), I've been thoroughly enjoying the simple deliciousness that can be found in a good product.  Seriously, people dribble this balsamic vinegar on their ice cream.  It's that good. 

Why am I tell you this?  You ask.

Well, for a few reasons.  If you are into embracing a whole foods approach to cooking, then chances are, you will be pairing your cupboards down to the basics.  Long gone will be conveniences of the past, like salad dressings, marinade mixtures, canned soup and boxed pasta.  You will be making things from scratch!  And thus, you will be using the most basic of ingredients.  Instead of grabbing for that bottle of dressing, you will instead be mixing up your own with staples kept on hand at all times: olive oil, vinegar, and herbs.  And thus, these few basic ingredients that one keeps on hand should be...well...quality.

You see, with the money that I can save by making my own salad dressings, I can easily purchase a high quality olive oil.  Or vinegar.  And when you strip your recipes down to these basic ingredients, their quality really does make a difference.  If you make a homemade dressing with a low-grade olive oil, while it can be done, you will taste a difference.  

And so I have found with my vinegar.  

If I could somehow smear this vinegar on your computer screen so that you could take a lick of it as it dribbled down, trust me, I would.  Literally.  Heck, I'm just tryin' to help you out here people.  I've used many-a-bad bottle of balsamic vinegar before I found this prince.  

And I'm not sayin' that you gotta go buy the best of the best.  But what I am saying is always keep your eyes and ears peeled for those additives in your food.  Even your vinegar!  Having a product that is free of the poo-poo that they put in foods these days makes a difference.  Plus, at roughly $8-$10 a bottle, this stuff is super-affordable.  If you don't trust me, try it for yourself here.  Or check your local grocery store!  

Now, that doesn't make me a food snob does it?

Does it?!

Please tell my husband it doesn't.  If you do, I'll sneak you a bottle of this.  No questions asked.

Cheers!

Monday, August 22, 2011

I got the market blues.

I spent another lovely Saturday morning at the Farmers Market this past weekend.  I bought three large purple bell peppers for $1, three zucchini for $1, three cucumbers for $1, and...


...freshly baked donuts.


Actually, my Dad bought those.  I ate them.


And as I strolled the lovely lanes of produce stands, I must admit, I felt a little depressed.


How could these farmers be harvesting huge heads of cabbage already...when mine are still so little and caterpillar infested?


And what about those peppers?  Mine are still the size of large lima beans!


Some booths were selling strawberries...must be of a late variety, as mine gave out months ago it seems like.


And the tomatoes?  Folks, let's not even go there.


I couldn't help but feel a little envious - the farmers there are so good at what they do.  And while I realize this is how they make their living...and they are professionals...I still couldn't help but covet their wisdom.  They have put my garden to shame in all it's adolescent glory. 


Although I've gotten a fair amount of produce from mine, with a few months of growing still and many a harvest ahead, it is still nowhere near the goal I am aiming for.  Each year that I have tended to my garden, I have increased the size and the productivity of it.  So maybe in ten?  Fifteen?  Twenty years?  I'll be producing as much as I'd like!


And all of this produce got me thinking - how is it possible to learn how to learn not only to garden out of "hobby" but actually garden out of a sincere desire to grow your food.


Sure, I love to eat a nice fresh potato for the novelty of it.  But how then do I turn that into enough potatoes to last us through the entire year?  


How do I grow enough tomatoes to supply us with sauces from one harvest to the next?


Onions?  Beans?  Herbs?  Cabbage?  Carrots?  Parsnips?  Peppers?  Berries?  


I don't just want to garden.  I want to GARDEN, people.  Ya know what I'm sayin?


Being an emotional brain-fart, I sat down with my husband to share my distress.  I wanted to make sure that he was on the "homesteading bandwagon" with me.  I know that we have a lot in store for us - a lot of hard work to be done!  There is a reason that we have established more conveniences in this modern world - because they are convenient!  And cheap!  And mindfully choosing a life that is not centered around these conveniences is a tad overwhelming at times. 


Honey, I said, I really want to garden.  How do those farmers do it?  They've had peppers at the market for a month now and mine still are so little!


That's their job, Shaye.


I know, but still.  How do they do it?  Do they hoop-house their beds?  Do they use heaters?  A crazy amount of Miracle-Gro?  What!?!? I need someone to show me!!!


Why don't you move to a farm and learn.


Will you come with me if I do?


No.


Fine, I'll do it.  


I'm kidding...Stuart would never send me off to live on a farm all alone.  Probably not, anyway.


They say that experience is the best teacher, and while that is good advice, it can be frustrating.  Because when you garden, you get one or two shots a year to get it right - and you don't want to screw that opportunity up...or you'll be left with green tomatoes and no butternut squash come October.  Not that I know that from experience or anything.


So how do I do it better?  How do I stretch out the short season we have here in Washington and use my ground to the best of it's ability?


After doing some research, it seems that adding some hoop-houses (like the one pictured below) would be beneficial in our area.  Not only would I be able to plant about a month earlier, but it would also keep the temperature raised for vegetables like tomatoes and peppers.  Under a hoop house, I could be ready to harvest my peppers and such about a month earlier than normal.


Take that ya dang green tomatoes!


I could also use these same hoop houses in the fall to protect my plants from the first bites of frost.  Lettuce, kale, swiss chard, carrots, potatoes, herbs, and onions would all like a nice little home under one of them.


I've found a few plans that detail how to make a hoop house over an existing raised bed for a little under $20.  Not bad.


So guess who gets to build some hoop houses?


Stuart.  That lucky guy.


I know I'm young and have years still to acquire the vast amount of knowledge it takes to grow food well.  I know that each year, I will learn more and more about the needs of each particular plant.  I will learn about soil temperature and quality.  I will learn about pollination and pruning.  I will learn about worms and pests.


But dang man...if anyone wants to give me the Cliffs Notes version of how to garden without such drastic failures, I'd love you forever.


Until then, I will be very thankful that someone...although not me...can grow large, beautiful sweet peppers and lush juicy tomatoes.


And I will be very thankful that they are willing to sell them to me for $1.


Now, if you'll excuse me, I must go find a local farm that is willing to take on a crazed wannabe-farmer, her husband, and a sweet-cheeked baby as amateur interns.


The end.


How did YOU learn how to garden? 

Friday, August 12, 2011

Natural Sweeteners & Canning & An Old Lady Named Fannie.

You know, I have people tell me all the time "I want to be healthy!"  And while "healthy" is a very vague term these days, I think the general consensus is that people want to eat food that nourishes them and eliminate more and more processed foods out of their diet.


For example, did you know that white table sugar actually pulls nutrients out of your body?


It's true.  It's like a nutrient vacuum.


Over the past year, we've been phasing white sugar almost completely out of our diet.  And except for the occasional latte or church potluck (umm...YUM!) we pretty much steer clear of the stuff.  Not that one scone is gunna kill ya - but in general, if we're cooking, we don't use it.


So what the heck do we use instead?


Well, if you're looking to eat (I'm going to try and be politically correct here and instead of saying "healthy" I'm going to say "nourishing")...if you're looking to eat a more nourishing, whole-foods centered diet, in your kitchen you can easily replace sugar with the following:


1.  Raw honey.  Notice that first word: raw.  Raw honey, just like milk, hasn't been pasteurized.  Therefore, all of the beneficial nutrients are still intact!  Because the honey has not been heated, it is "loaded with amylase, enzymes that digest carbohydrates, as well as all the nutrients found in plant pollens." - to quote Sally Fallon.  Plus, honey has an infinite shelf life - so who needs pasteurization!  If you only look at the health food store, raw honey is gunna cost ya.  Instead, look to local sources.  Or, look for a whole foods co-op in your area!  I order from Azure Standard and a gallon of raw honey runs me about $30.  Not too bad, considering it takes us about 3 or 4 months to go through.  Honey goes on our toast, in our desserts, sweetens our tea, our oatmeal, our homemade dressings, our homemade bread and more.  Super handy to have around.  


2.  Rapadura.  This is my go-to sweetener.  Rapadura is dehydrated cane sugar juice.  Here's how it works:  the sugar cane is pressed to release the juices.  Then, the juices are dehydrated and ground up into rapadura.  Ta-da.  That's it.  No heating, no processing.  Because rapadura is un-fooled around with, it is "rich in minerals, particularly silica." - to quote Sally...again.  Imagine that - a sweetener rich in minerals!  While you still need to limit the amount of rapadura you eat (heck, it's still a sweetener folks!), what's nice about rapadura is it can easily substitute 1:1 for sugar.  Rapadura also adds bulk to recipes, which makes it ideal of cookies and cakes when you need bulk.  It stores just like sugar.  See?


It has a slightly richer taste then sugar, maybe slightly more molasses-ey.  I use it in everything I would normally use white sugar for.  I also order my rapadura in bulk, which is totally worth it - it's expensive at the store in small amounts!  Through Azure Standard, a 25 pound bag costs roughly $60.  Ya, I know.  It seems expensive.  But when sugary desserts are really a treat, you won't go through it nearly as fast as you think you will.  


3.  Maple Syrup.  Um, yum.  I love maple syrup.  I love it in my oatmeal.  I love it in my muffins.  I love it on my pancakes.  I love it on my cheeseburgers.  Just kiddin'!  This one is pretty self-explanatory, I think we're all pretty familiar with the 'ol maple syrup, however, a few points of warning for you:  #1.  Make sure it's real maple syrup.  As in not Mrs. Buttersworths (which is delicious, but none-the-less, a whole-foods nightmare).  Yes, real maple syrup can be expensive.  Again, buy in bulk and use sparingly!  And #2.  Formaldehyde is used in the production of most commercial maple syrup - so choose your sources carefully.  I'm just sayin'... It's worth it to look into the companies you buy from.  You may be shocked at what you find!


I know there are many more we could discuss, but these are the three primarily alternatives that I use.  Switching out your sweeteners can be an easy step towards a more "whole-foods" approach to cooking.  Even more so successfully, of course, if you work to avoid all the other nutrient-challenged sweeteners that have bombarded our food system.  


Oh - and by the way!  Guess what I did?


I canned peaches with my rapadura!  That way, even our canned peaches can be rich in minerals!  While I love poppin' open a can of peaches, I hate it that they have to be bathed in a sugary-syrup.  While looking for alternatives, I just thought...hey!...why the heck not.  So I gave it a try.


Initially, the extra-light syrup was very brown and it looked like the peaches were swimming in swamp water.  But after processing in the water-bath, the syrup turned much lighter.  


I guess you never know until you try, huh!?


I tried.  And now I know.


Also, please don't comment at how ugly my cans of peaches are.  My Grandpa would be ashamed.  I don't always do the prettiest job, but heck, at least I try.  


I just have this picture of some old lady named Fannie at the county fair who slaps a big red ribbon on my mis-match, squished jar of peaches and says "Nice try, lassie. Make 'em prettier next time and maybe you'll get a blue ribbon. I tell ya...this generation..."  Then, she grumbles as she walks away.  And I cry.


So maybe they're not blue-ribbon pretty.  But you know what?  I got over fifty pounds of peaches this year, for free.


So jokes on Fannie.


Cheers to natural sweeteners my friends!